Logging into your new instance “in the cloud”
OK, so we have rented a computer for you. It will be yours alone for the rest of the day, and it is a blank slate. It doesn’t have blast (yet) and doesn’t have any data.
If you are on windows and weren’t here yesterday, you need to install git bash: git bash.
The network name of your new computer we gave you on a scrap of paper.
The username for your instance will be “ubuntu”.
First, you must download the private key file from here: soils.zip
This gives us a compressed (and encrypted) zip file.
First, we need to uncompress it. You might be able to uncompress it automatically by clicking on it and entering the password, but:
cd ~/Downloads
unzip soils.zip
should be enough to give you soils.pem.
When you have soils.pem, move it onto your desktop.
Next, start Terminal (for mac) or gitbash (for windows) and type:
chmod og-rwx ~/Desktop/soils.pem
to set the permissions on the private key file to “closed to all evildoers”.
Then type:
ssh -i ~/Desktop/soils.pem ubuntu@ec2-???-???-???-???.compute-1.amazonaws.com
(Where you need to put the address for your machine, distributed on a sheet of paper, here)
This is the command that opens a bash connection to control your private instance in the cloud.
This command uses ‘soils.pem’ as the private key, uses ubuntu as the user name, and opens an encrypted connection and a bash shell on the ‘ec2-???-???-???-???.compute-1.amazonaws.com’ server.
Declare victory
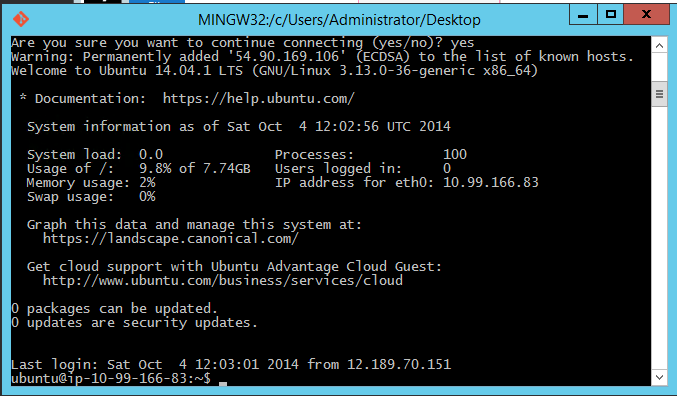
At the end you should see text and a prompt that look like this:
or, on mac:
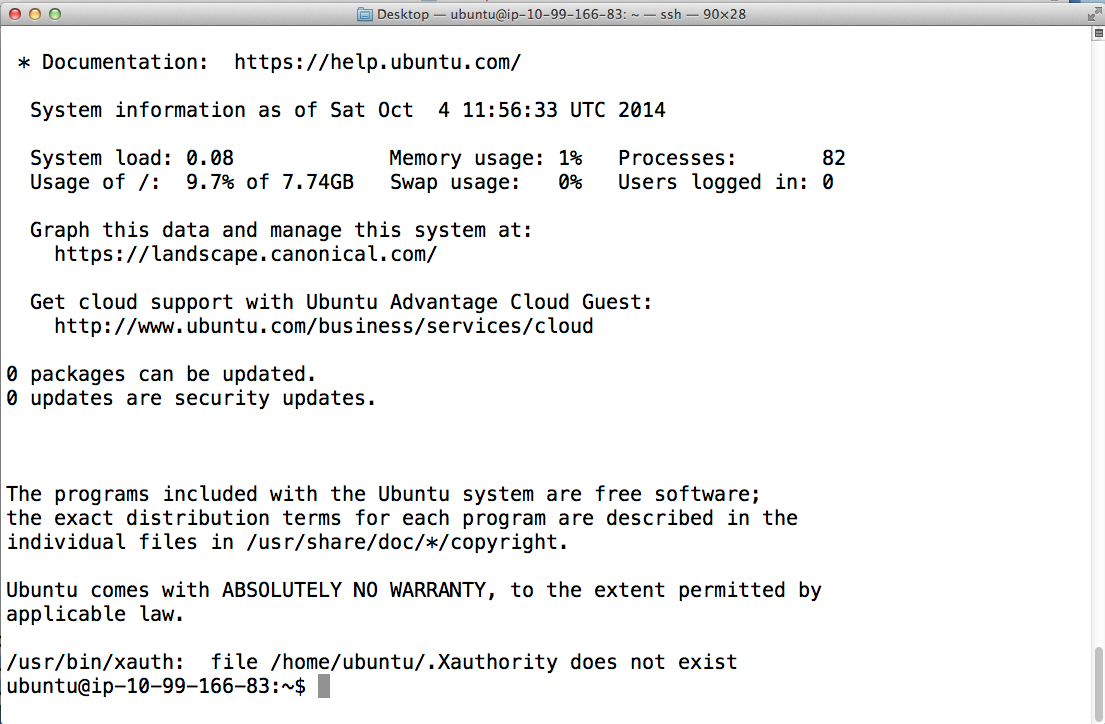
Congratulations, you now have CONTROL of your own EC2 server.
We will keep these servers running for the rest of the day; if you want one for longer than that, you need $.06/hour willingness to make it happen. (Think about it.)
Amazon Web Services reference material
You can find help online configuring, managing, and otherwise using EC2’s interface.
For this workshop, we provided 40 instances that were blank except for the soils.pem key.
If you would like to learn about instances on your own, try the original 2013 CEMI workshop at Caltech workshop, which includes instructions on how to start instances from scratch.